
Five Ways to Improve Your Restaurant Photography


This post contains affiliate links. I will make a small commission if you make a purchase through one of these links, at no extra cost to you.
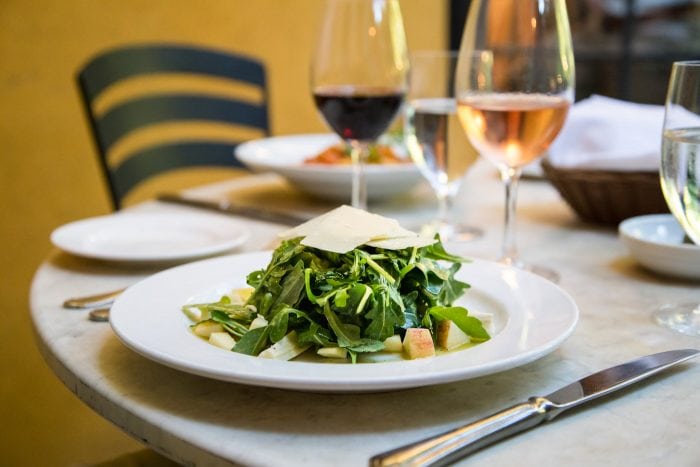
Restaurant photography can be difficult. We’ve all been there, eating dinner, trying to take a quick pic of the awesome meal we just ordered, having it come out underexposed, grainy, and yellow because the lighting is terrible and there just isn’t enough of it.
Below you will find five ways to improve your restaurant photography.
Before we go much further, the type of restaurant photography I’m discussing in this post isn’t the casual “snap a quick pic” of your meal type snapshot.
We’re talking about the real deal. This post is all about when a restaurant owner or chef hires you to take photos for their menu, their website, their social media accounts, or hey, even to hang on their walls!
Or maybe the scenario is a magazine has hired you to take photos for a restaurant or chef they are highlighting.
So, how do you make sure you are getting the best shots possible while shooting in restaurants?
#1 Have a Pre-Production Meeting
This will really help you and your client make sure you are on the same page. You’ll have the opportunity to go over your workflow and the process of taking food photographs.
Remember, you know what you need to get the job done. You can take this time to go over all of the details that go into creating beautiful food images. Take the time to educate whoever is involved in what needs to happen in restaurant photography.
This can include the following:
Discuss the shot list – What shots need to happen? You may have to ask for a shot list if they do not have one prepared. The may not be aware of what a shot list is so you might have to assist with the creation of a shot list.
Aesthetic – asking your client to create a mood board might help with nailing down the look and feel of the images you will create.
Coordination – The timing of when the dishes come out of the kitchen is crucial and is often overlooked. You will want to speak with the chef (if you are not already in contact with them!) and create a plan for this.
The longer the food sits while waiting to be photographed, the less appealing and camera ready it will be.
Formulate a plan – This can include the coordination with the chef discussed above but this pre-production meeting will likely happen at the restaurant and it will give you the opportunity to see the space and form a plan of action.
Where will you shoot? What table? What window will you use (if you are using natural light)?
Will you have space to yourself, sectioned off from customers? Will it be during normal business hours?
Maybe you can schedule the shoot before or after the busiest time of the day. Once you see the space and begin to formulate this plan in your head (or on paper if you are a list maker!) share your plan with your contact to make sure they are on board.
These are all important questions to have answers to before you being your journey in restaurant photography.
Same page – This one is important and includes everything above including other things such as payment, contracts, and managing expectations.
#2 Bring Props
The restaurant likely has a standard of dishes they use to serve their food but if you aren’t working with a prop stylist (you likely won’t be unless it is a large chain restaurant) you will have to think about the mood that needs to be conveyed and props will help you do this.
If the restaurant wants to use their own props, don’t worry.
They are doing this to create continuity and manage customer expectations.
If this is the case, you need to be mindful of the types of bowls and plates they have. If they have a plate with a large lip, you might not want to shoot too many straight-on shots.
The lip will start to take over, become distracting, and the food will be lost.
That being said, you still might want to have some backup items in your on location/traveling bag!
You never know what you might need when it comes to restaurant photography! Or really, any type of food photography!
#3 Find the Light or Bring Your Own
If you are using natural light:
Finding light should happen during the pre-production meeting, especially if this is a new-to-you restaurant.
You should locate the best spot to photograph the dishes based on the location of the windows and how large they are.
You should also think about diffusing your light and what you might need to bring to make that happen.
A large diffusion panel would be helpful with restaurant photography. The same rules of light apply while in a new location.
Don’t forget to bring something to bounce your light back into your scene.
A fill card of some sort whether it be a reflection disc or a $1 foam core board from the craft store.
If you are using artificial light:
If you are in a dark restaurant with small windows, or if the owner or chef requested you shoot at 5 pm when they open (in this scenario, it’s the middle of winter and you live in New York so it is already pitch black!), you will need to bring artificial lights.
The above story happened to me when I was still a fairly new photographer, shooting strictly in natural light. I landed a job with a dream client and I was not allowed into the restaurant until after the sun had gone down.
The restaurant only served dinner (this is common!) and would not open early for me. This was an issue for me and I did not take the job.
In fact, this story is the driving force behind learning, growing and expanding my skills to include artificial lighting.
As I look back on it now, it is one of the biggest regrets of my career, especially now that I understand, love, and am no longer afraid of artificial light.
It doesn’t have to be complicated but I made it extremely difficult in my head.
I am sharing my experiences with restaurant photography so you can learn from my mistakes!
#4 Bring a Basic Food Styling Kit
Food stylists really know their craft and are truly amazing at what they do. As a food photographer, you have a great eye and you will be able to do some basic food styling.
If the chef is really great at plating their food, you might not need to do much in terms of food styling but it is a good idea to always be prepared with a few essential items:
Small Tongs – these are great for moving tiny things (such as garnishes) around the plate
Q tips & Windex – Dip a q-tip in Windex helps to clean up any splashes or spills on to the plate. You might not want to eat the food after the shoot
Glycerine or Karo Syrup & Mini Spray Bottle – If your shoot includes beverages you might consider bringing something to help add condensation to the glass (a 50/50 glycerine (or Karo Syrup) & water mixture in a mini spray bottle.)
Paper Towels – Just in case some larger spill happens!
Oil – Vegetable and Olive oil will help hold food longer on set
You don’t need to bring the whole bottle of oil or windex, those small travel bottles can come in handy while you build your basic food styling kit.
The list above is a very basic kit. You might want to consider adding food styling as a list of topics to discuss during your pre-production meeting.
The chef might have a specific style or story to tell and you will not want to obstruct their vision.
It’s better to be over-prepared than to wish you had brought something!

#5 Open Communication While Shooting in Restaurants
It is a great idea to establish open communication early on with everyone involved.
When most projects and relationships go wrong it is likely due to a lack of communication so be sure to nip this issue in the bud before it starts!
This line of communication should be with everyone involved.
This includes (but is not limited to!) restaurant owner, manager, chef, server, runner, bartender, and PR reps.
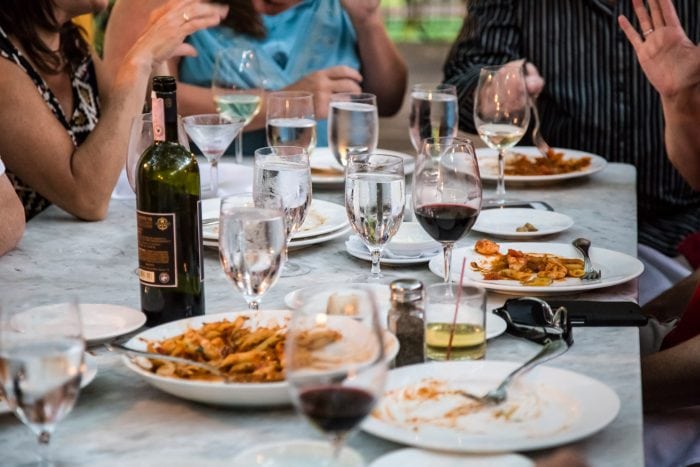
I have used bartenders, servers, runners, and anyone else who would hold a plate of food or a tray of drinks to my advantage.
They are usually well dressed and have clothing that compliments the mood or the story.
The photo above with the awkward size serving plate looked great against the servers blue shirt so I stopped in my tracks, asked him to position the plate a specific way, and shot a few exposures.
This was completely unplanned for and very much on-the-fly. The result: one of my favorite restaurant shots.
This happened easily as I had already established a rapport with everyone involved.
That being said, proper planning is important but don’t be afraid to venture off the shot list if time allows.
Other Details That are Helpful While Shooting in Restaurants
As promised, here are some other things you might want to consider or bring with you on location.
Light – We talked about this earlier but it is worth repeating. If you know the restaurant is dimly lit with not many large windows you will have some issues. You might want to bring your own light source.
This can be in the form of a Speedlight (flash unit) or a strobe light if you’re fancy like that. This can also be a simple continuous light. You just need one and some accessories to reflect the light (a fill card, a real reflector disc, a simple $1 foam core board from a craft store).
Remember, you will need to diffuse the light source so you can think about using a modifier like a softbox or diffusion panel.
Liability Insurance – I am not a lawyer and this is not legal advice but you want to protect yourself if someone gets hurt while you are shooting nearby. It is quite easy to trip on a wire from your light or bump into your tripod.
Model & Location Releases – Again, I’m not a lawyer and this is not legal advice but if the restaurant wants customers in the shots, this is a whole new level that needs to be considered. Having some lawyer-drafted releases in your possession might be helpful.


