
Six Ways to Add Storytelling Elements to your Food Photos


As food photographers, we all tell food stories in various ways. Below you’ll find six specific ways to help you tell those stories.
I’m sure that we all have strong memories that are connected to food in one way or another. I call these “food memories” and they are definitely part of my overall “food stories” that I share with people from time to time.
For instance, my dad passed away in 2007 but I have such a strong memory imprinted in my brain of him always ordering a chocolate and vanilla twist with rainbow sprinkles from our favorite ice cream place each Summer.
Now, I have no idea if this is even true. Did he really order this? I suppose my mom would know. Either way, I associate this ice cream with my dad and consider it once of my earliest food memories.
How would I tell this story visually? I might go to an ice cream stand and get them to pass someone that exact ice cream cone (sprinkles and all) and grab a shot of that exchange, making sure to get the image of the ice cream stand in the background.
Enough about my silly food memories. Without further ado, on to the actionable steps!

Adding characters
What is the one thing that you instantly think of when you think of stories? The people involved, of course! Those are the characters we know and love.
One way to instantly add a character to your story it to actually put a person in the frame.
This sounds super obvious, right? The addition of this person will level up those photos in the realm of story almost instantly.
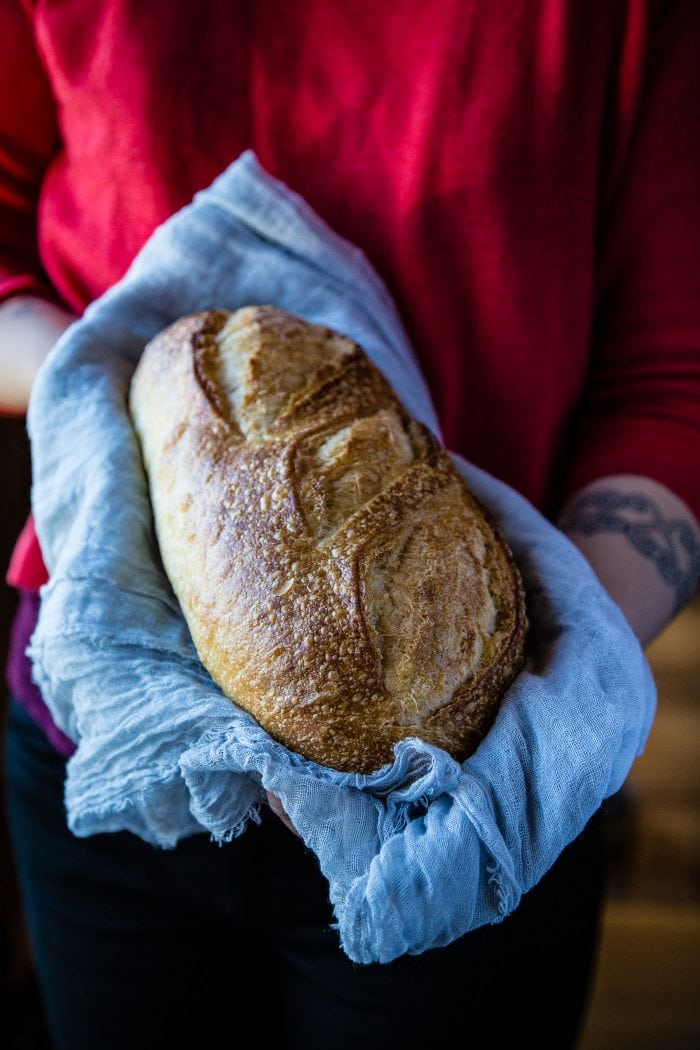
What are some ways that you can add people? I’m super glad you asked! My favorite way to do this is to simply put hands in the shot.
If you have someone to help you, this can be super easy. You just grab them and say “hey, hold this.” This is demonstrated in the shots above and below of hands holding bread and a bundle of asparagus.
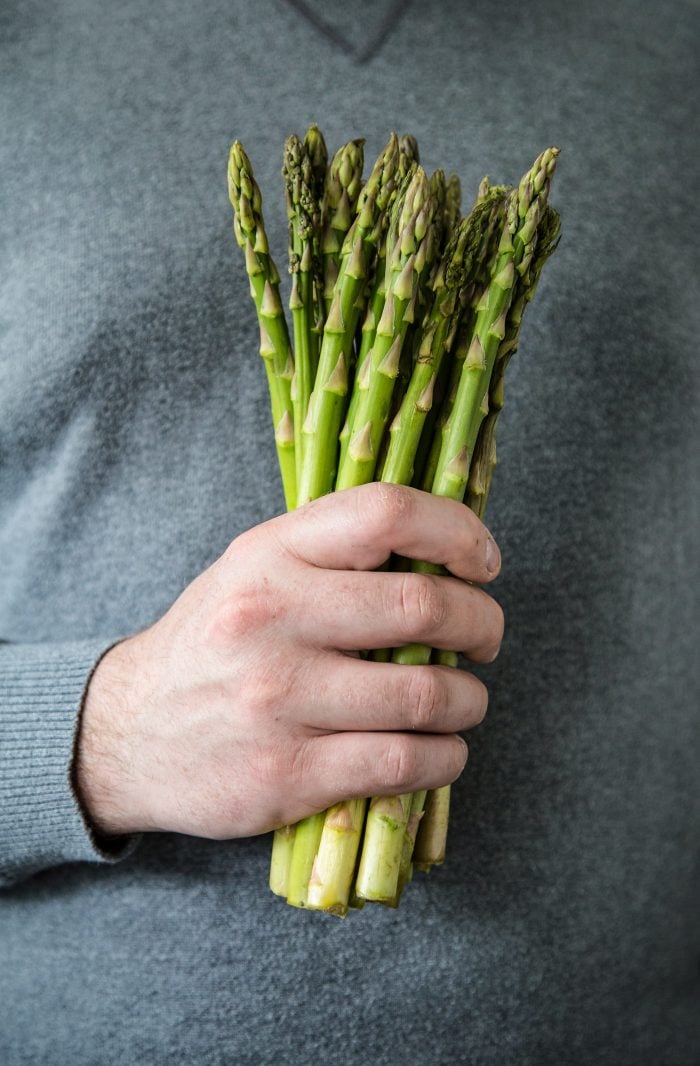
I was grasping at how to make this bundle of asparagus interesting and I thought, let’s add some hands.
These hands help to create that character. In this case, he is likely the person who is about to cook a meal with the asparagus. It makes me (as a viewer) ask these questions:
- Who is this person? Are they the farmer? The chef?
- What are they going to make with the asparagus?
Later in the post, you’ll likely have other imagery that will answer these questions. Perhaps in-process shots and final imagery that will tell us exactly who was cooking and what they made.
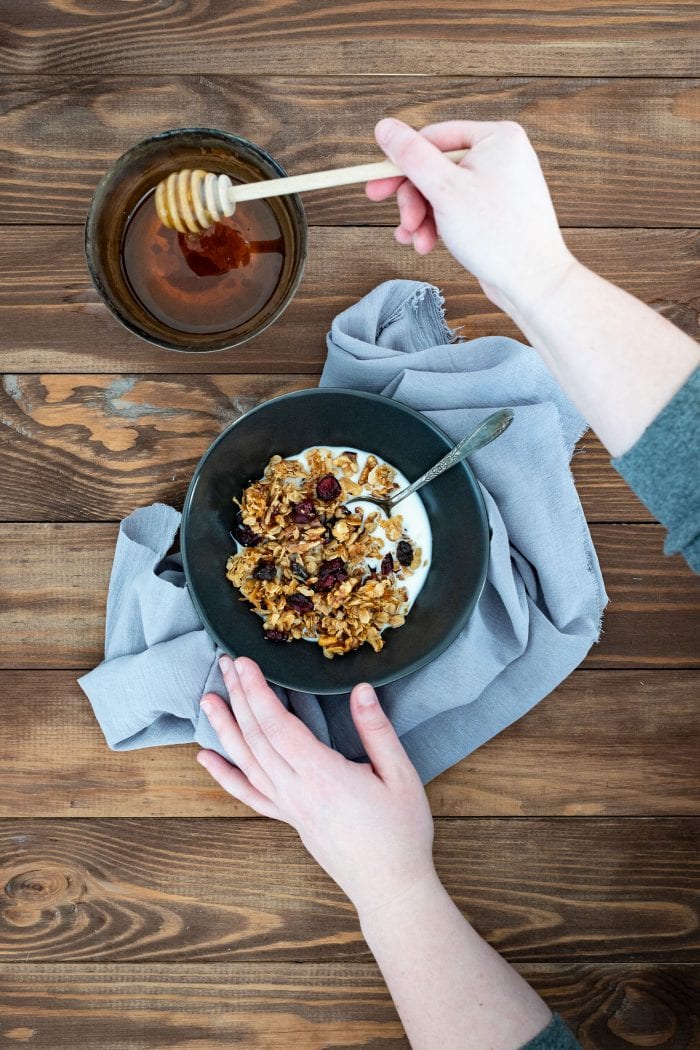
If you don’t have someone who you can grab real quick to borrow their hands, you can absolutely use your own hands in the image.
The above image is of some awesome Cranberry and Raisin Granola that I made and wanted to take new photos of. I grabbed a bowl, set my scene, poured the milk, took a few shots and then finally decided to put my own hands in the frame.
Going a step further, I added some action here by grabbing the honey. We’ll talk more about that below!
Taking photos that show action and motion
Adding action to your photos is absolutely going to aid in the storytelling of the images.
These also tend to have the added benefit of having a character in them. This action will add context to your overall image by showing your viewer what was done to create the meal.
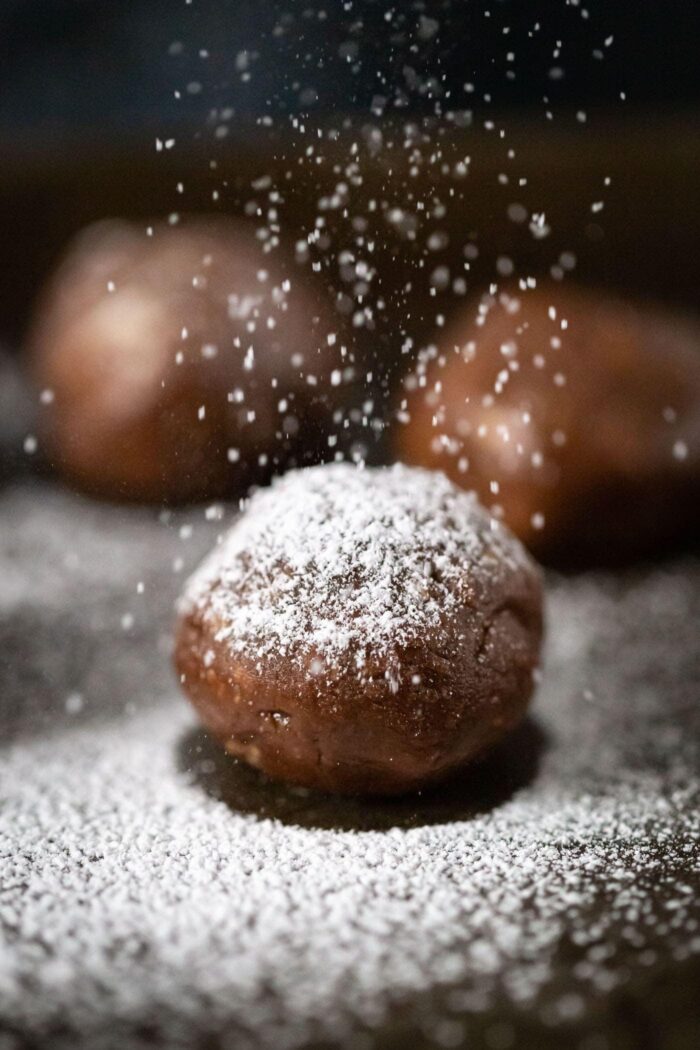
The Peanut Butter Truffles above show powdered sugar being sprinkled on top to look like snow.
Fun secret: This photo is actually a composite of two images!
Action photos include:
- Drink pours – Wine, beer, tea, coffee, soda.
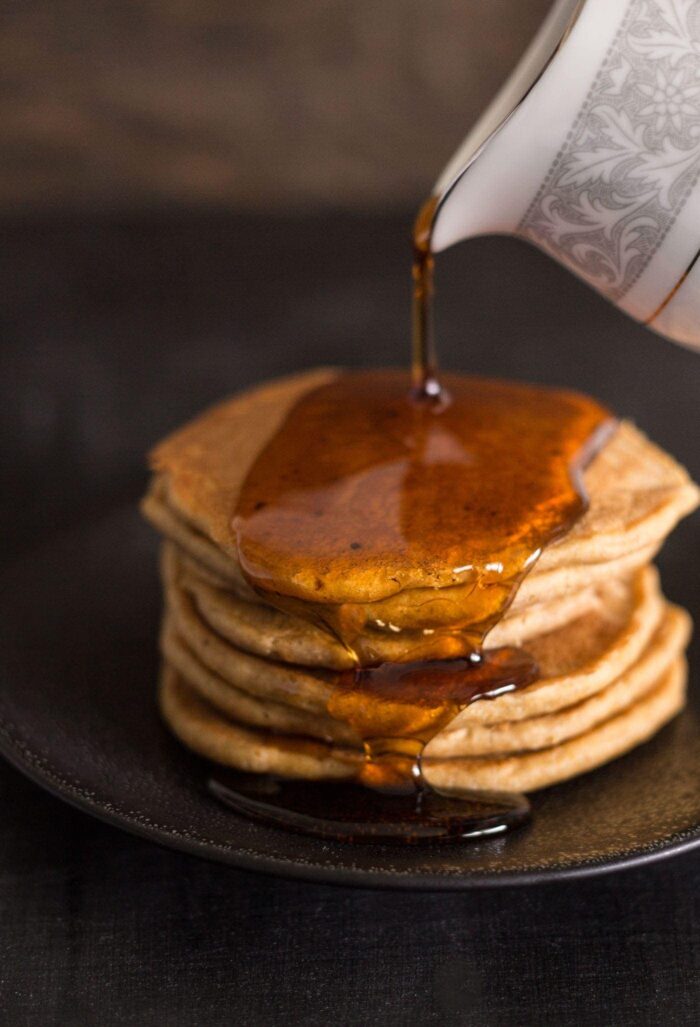
- Syrup pours – Maple syrup on french toast, pancakes, or waffles.
- Drizzle shots – drizzling something such as honey or a semi-thick sauce on top of a food item.
- Sprinkle shots – Sprinkling powdered sugar on cookies, throwing flour on a surface or dough to kneed.
- Prep shots – Actually prepping the food. This goes back to what we discussed above and adding hands/people
- Eating shots – Just another type of action shot that we have previously discussed in terms of adding hands as a way to further the story of a series of photographs.
The Setting: Where? Setting the scene with background context
In food photography sometimes we have the tendency to choose a surface (what you are shooting on) and a background (what viewers see beyond the food) and call it a day.
Adding some other more interesting background elements can be interesting and aid in the storytelling of food imagery.
What are some background elements that we can add that are not marble slabs, rustic wood, or hand-painted backgrounds?
I’m glad you asked! Here is a short list:
Chairs – Putting a simple chair in the background at an angle adds the idea that someone is sitting in this chair. Bonus points for actually having a character added here too!
Picnic Scene – Placing a cute blanket down on the grass, having some of the grass peek through the sides of the blanket, and then laying down your spread really helps to add context for where you are!
Beach Scene – The same concept applies. The sand, the chairs, easy to eat food, the beer, a pair of sunglasses, all a perfect beach day to me. The sunglasses also add an extra storytelling element as they allude to a character. Who else would be wearing them?

Campfire – To me, having a campfire roaring in the background, or even a fireplace like in the above image, this can really help with the overall setting within the food photo.
Windows – The windows let you view the outside world so if you have a scene set up and then a window in the background, that can give some context of the time of year or time of day which will further those story details.
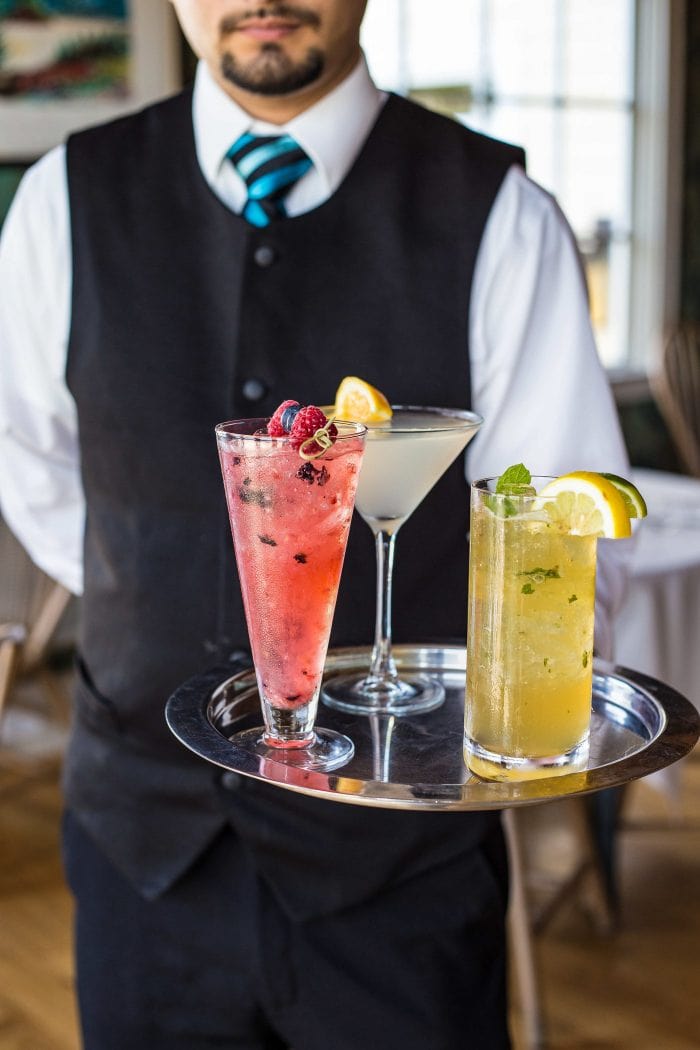
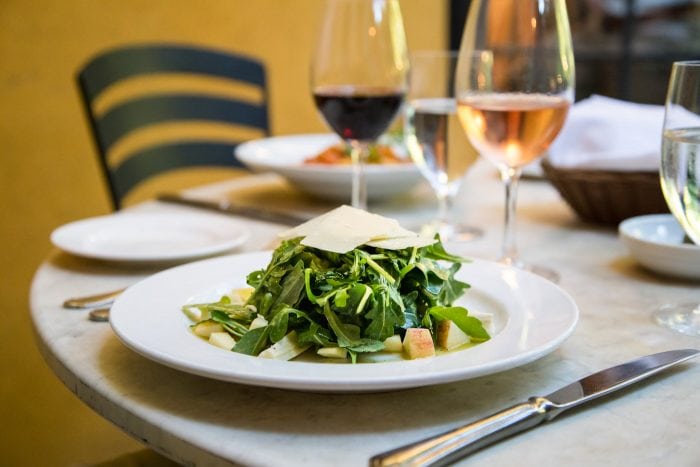
Bars/Restaurant Scenes – Having the bar in the background is a quick and easy way to add this setting context to your shot.
Having a waiter carry drinks in their fancy clothes also does the trick! (Also, bonus points for that character!)
What do you think these different background ideas will do for your viewer? The idea here is to transport them (in their mind!) to wherever you want them to be.
If you want them to think about how the beach sand feels in between their toes, showing a beach scene in the distance will 100% help with creating that story.
This specific scene idea is a bit difficult, you need to be near a beach in order to create it, but some of the others on the above list are a bit more attainable. For instance, the picnic scene, windows, and chairs).
Adding storytelling elements with Prop styling
A few storytelling elements include emotional content, dramatic questions, character development, and of course setting the scene, aka prop styling!
In order to set up your scene, you generally start with a surface and a background if you are shooting at a 90 or 45-degree angle.
These are considered some of the first props you will choose. Choosing these wisely will help to set the mood and in turn, add story elements to the scene.
For instance, if I choose a stained wood board or if I choose a marble slab. Those two different surfaces lead to different experiences as a viewer. The wood slap gives me a more home/rustic vibe and the marble slap is cleaner and brighter.
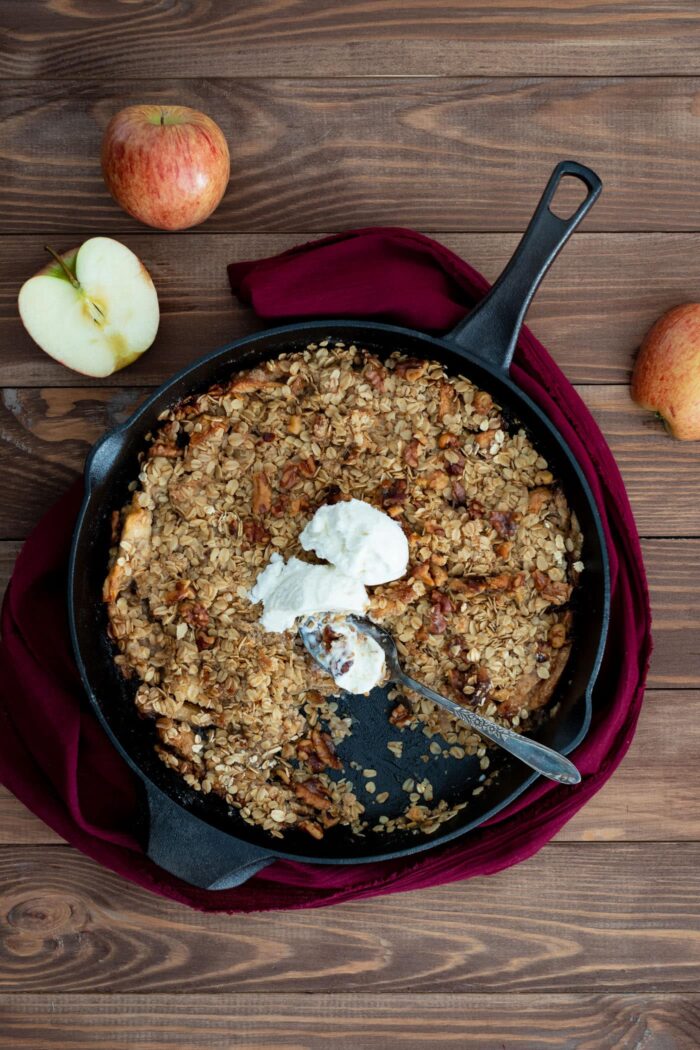
The above photo of the Apple Crisp has a more rustic vibe due to the stained wood as the background. This is carried through with the cast iron skillet, a typical food prep item that is often found by a campfire.
The scoop of ice cream with the spoon and a section of the apple crisp missing definitely adds to the story by creating the illusion of a character. There aren’t hands in this one, but we know someone was around because who dug into this dessert?
You guys, it was me… 🙂
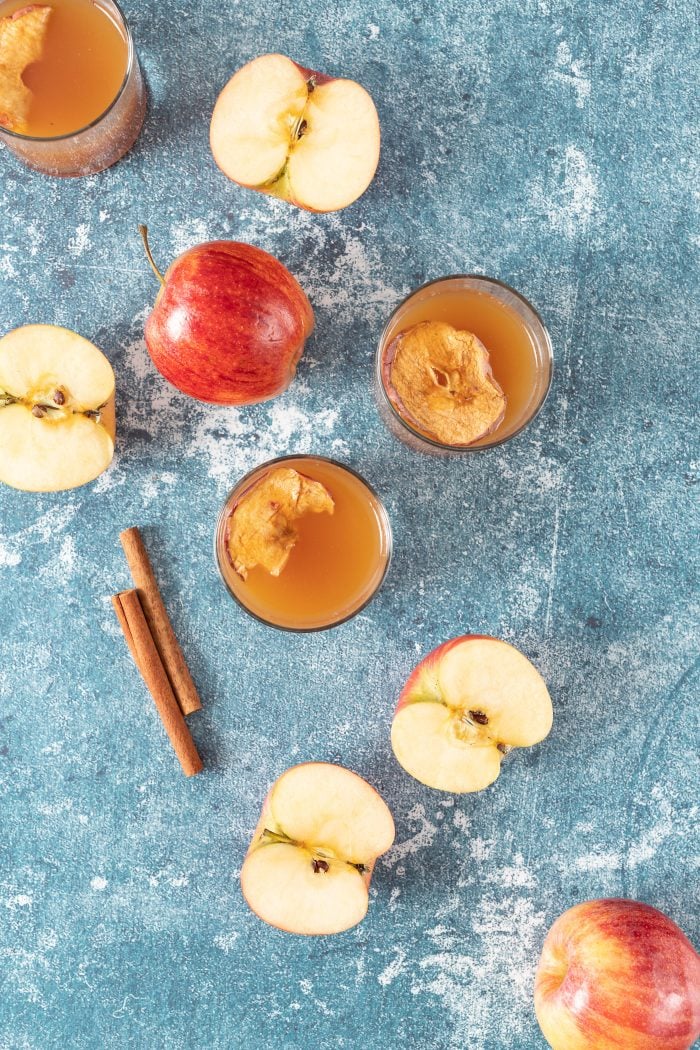
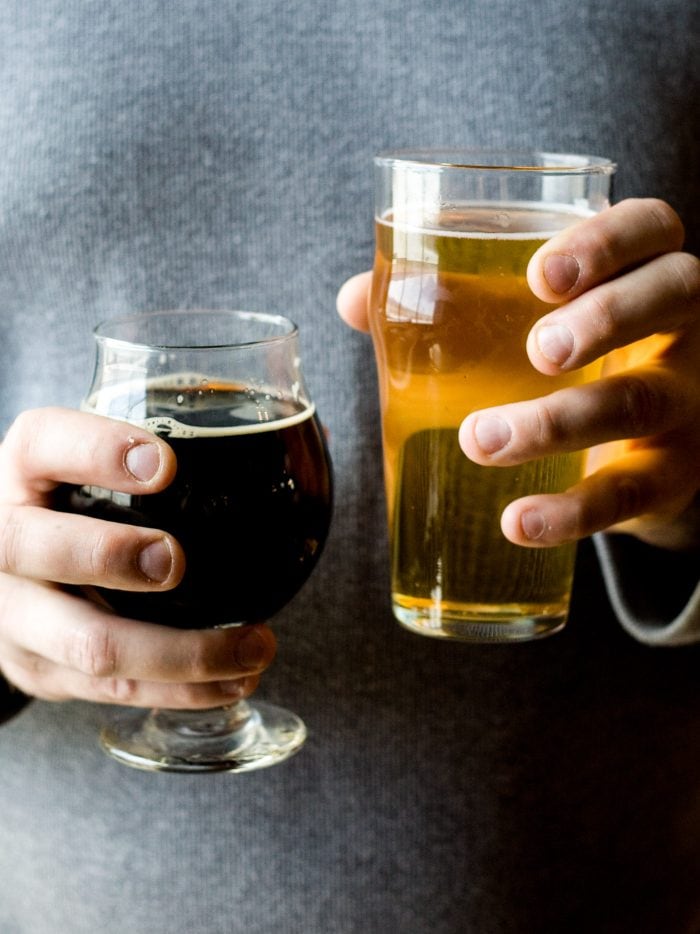
When shooting cocktails, creating a scene is easily done by adding at least two glasses. This creates the illusion that you are shaking up cocktails for a group. Perhaps, a party?
Adding in the food props (such as the cinnamon stick and the sliced apples is a really great way to show the process of building the drink.
In turn, this adds to the overall story of the cocktail by creating the illusion of a bartender.
Using and manipulating light
Soft light and hard light have different emotions and have the ability to create different vibes in food photography.
When you’re taking your next set of photographs for your food blog or for a client, ask yourself: what type of emotion and I trying to envoke?
Harsh Light is light that isn’t diffused and casts hard shadows throughout the image.
Even light is light that is nicely lit on all sides and there aren’t many hard shadows. This is done by diffusing light that is coming onto your subject and by bouncing light back into the scene.
Soft light vs. hard light, the never-ending debate. Both can be beautiful in their own way and have unique storytelling elements.
Once you have the answer to this, go a step further and ask yourself what type of light (hard or soft) will best illuminate that emotion?
Utilizing color theory to add storytelling elements to your food photos
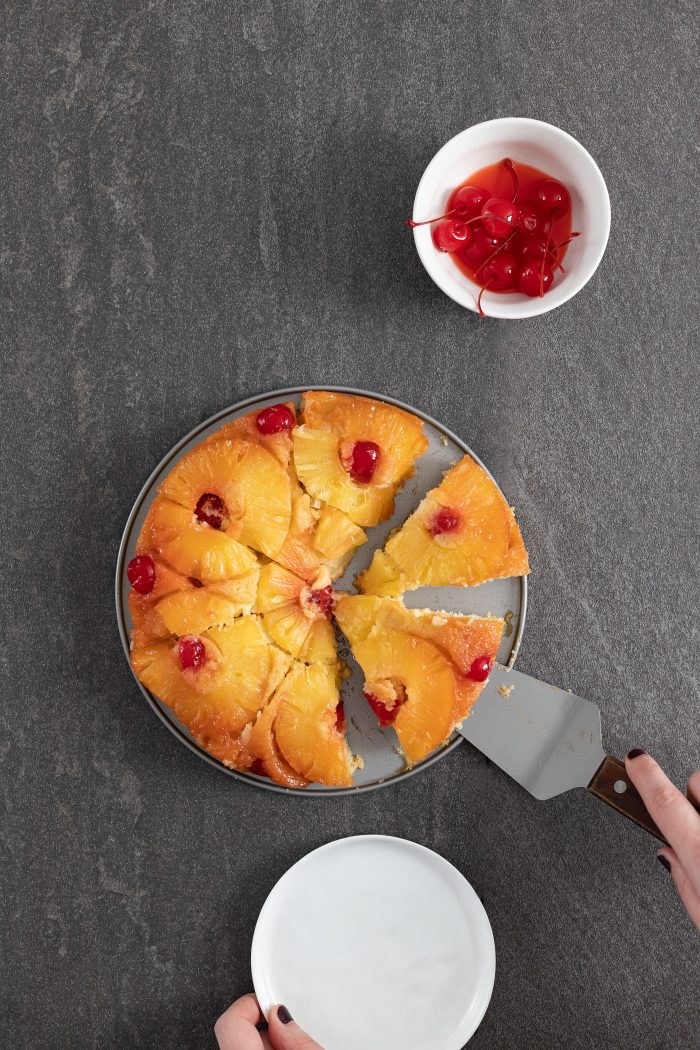
Analogous colors are those that appear next to each other on the color wheel. In the Pineapple Upside Down Cake above, we have shades of orange, yellow, and red which are all color wheel neighbors.
The rest of the colors in this image are neutrals such as white and gray. Generally, these color combos are found in groups of three.
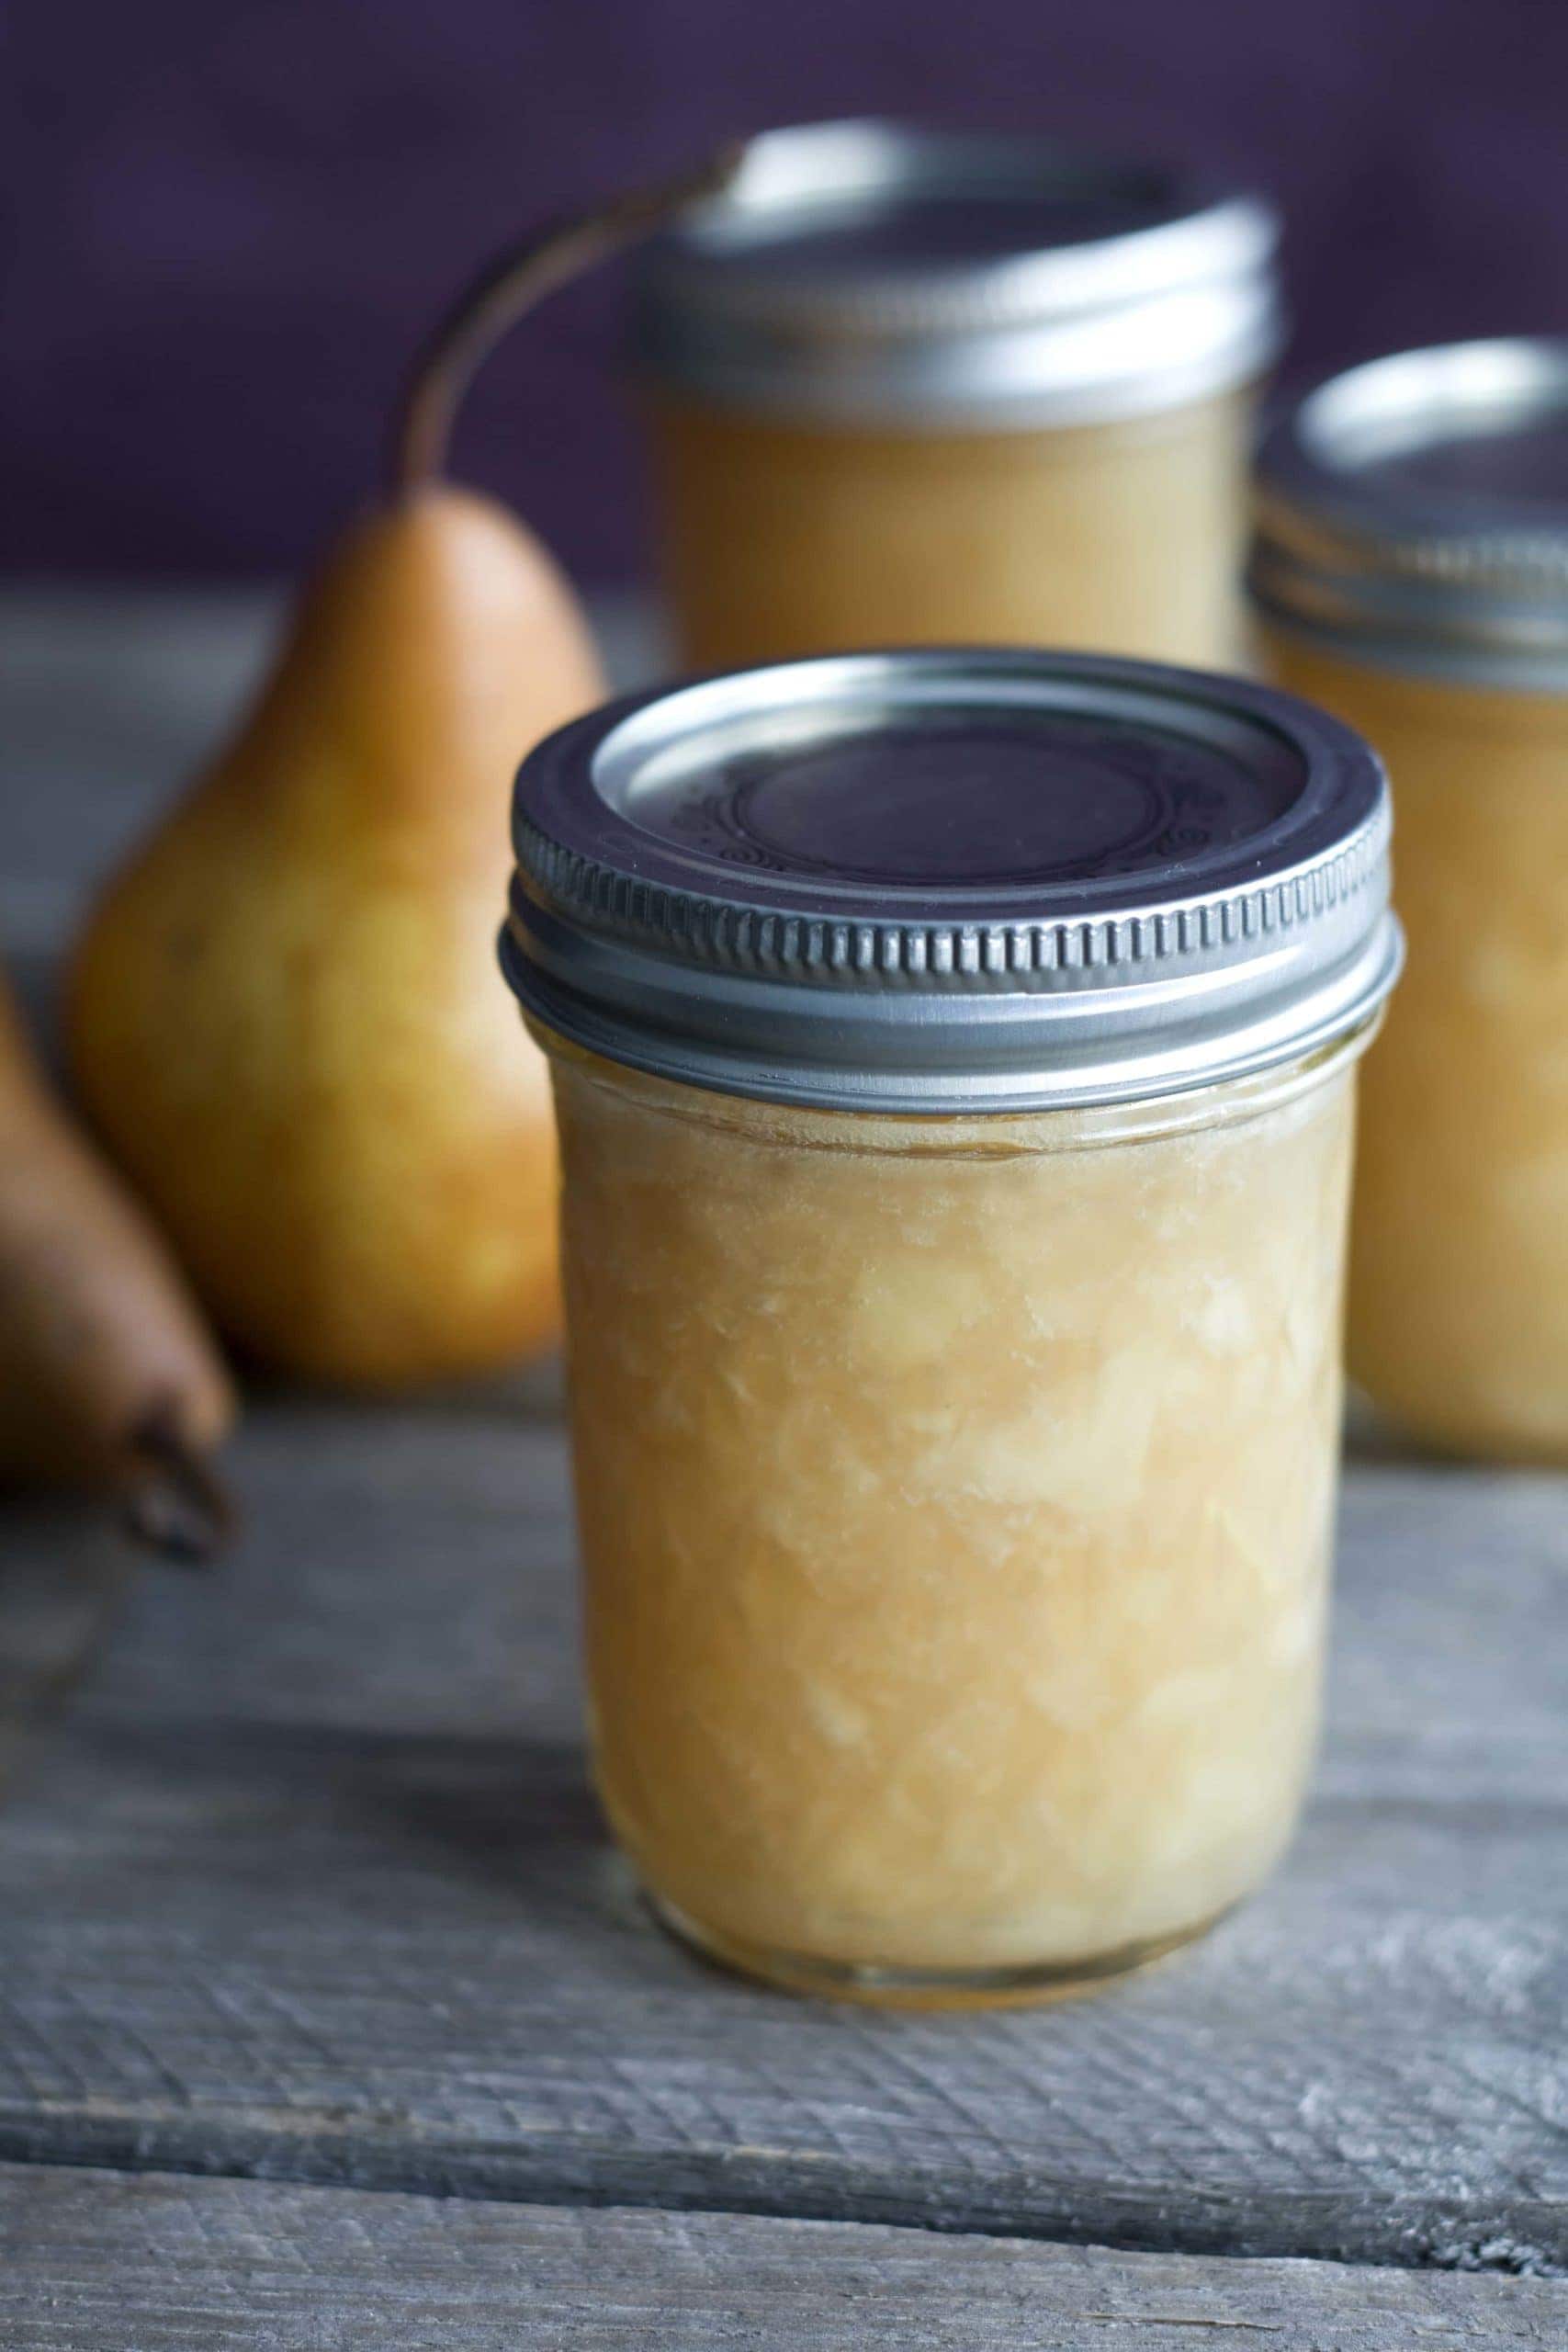
The complementary color scheme consists of two colors that are directly opposite each other on the color wheel. Examples will include yellow and purple as is the case in this Pear Jam photo or blue and orange.
Monochromatic color schemes use a single base hue and add white or black to it to create its shades, tones, and tints. In this example, I’ve used this copper hue in various shades throughout the scene.
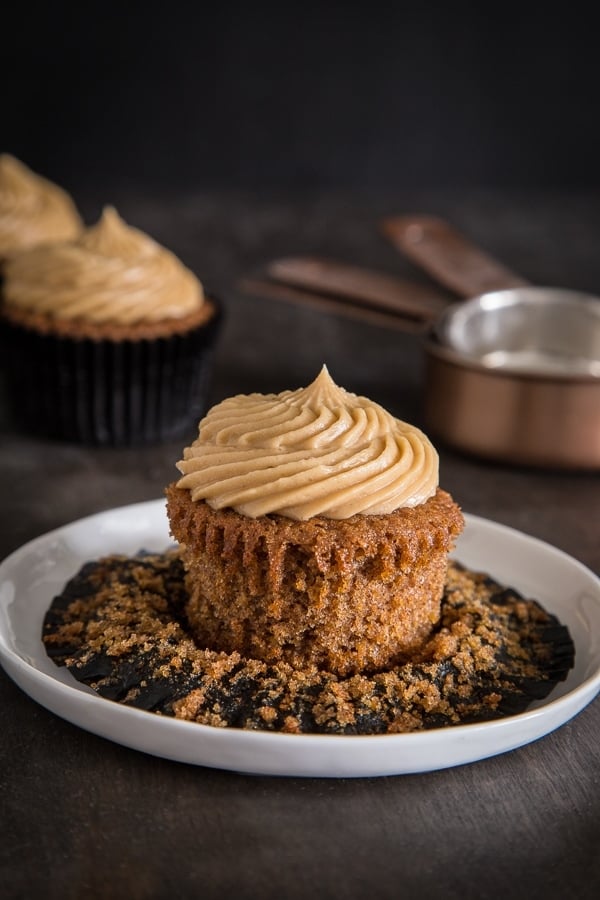
In these Acorn Squash Cupcakes, the base of the cake, the frosting and the measuring cups in the background are all different shades of the same hue while black and white are used as supplemental props to allow this monochromatic color scheme to stand out.
Tints are achieved by adding white and shades and tones are achieved by adding a darker color, grey or black.


