
Five Food Styling Tricks Using Everyday Items
Food stylists are incredible at what they do. There is so much that goes into making food look “camera ready.” If you ask me, food stylists are the unsung heros of food photography. On a commercial food photography shoot it takes a whole team of people to make a shoot go smoothly but as food bloggers, we are accustomed to doing it all on our own.
This post is dedicated to you. The ones who try to do it all. I must say, doing it all is difficult but we do it well, don’t we?

Below you’ll find 5 food styling tricks using everyday items that you likely already have lying around the house. You can use them to start building your food styling kit and on your food photography shoots each week. It’s amazing what you can do with a few household items!

First things First, we need to Understand Food Styling
Understanding food styling is crucial for creating visually appealing food photos. Food styling is the art of preparing and arranging food in a way that makes it look as delicious as it tastes.
It’s not just about making food look pretty; it’s about telling a story and evoking emotions. A skilled food stylist combines creativity, attention to detail, and technical skills to create stunning images that make viewers’ mouths water.
A good food stylist knows how to use props, lighting, and composition to create a narrative around the food. They understand the importance of fresh ingredients and how different shapes and textures can add depth to a photo.
Whether it’s a rustic cutting board or a piece of parchment paper, every element in the frame plays a role in telling the story of the final dish. So, next time you see a mouth-watering food photo, remember there’s much more to it than meets the eye!

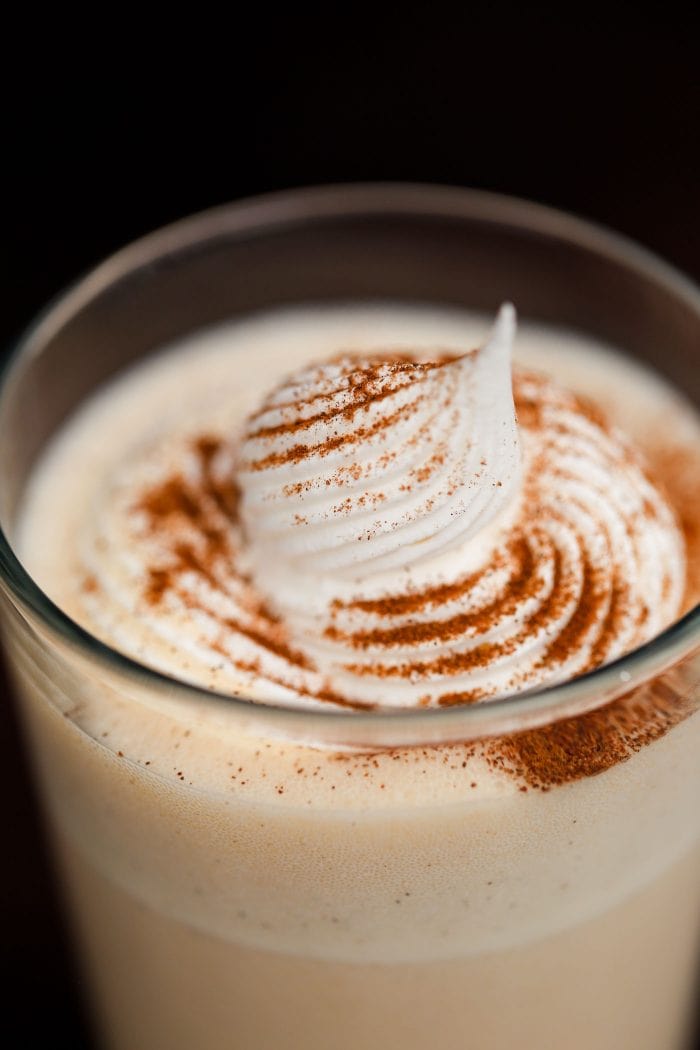
#1 Cotton Balls to Create Steam for Food Photography
Have you ever wanted to mimic steam coming out of a mug or off of some food? Understanding food styling skills can significantly enhance your ability to create such effects in food photography.
In the photo above, I poured and re-poured hot water into the mug in the hopes that I would finally get steam out of it and get lucky by capturing it with my camera.
Food styling tips can help you achieve better results in your food photography by providing practical advice on how to enhance the visual appeal of your images.
Every time I did this, it just wasn’t enough steam for my liking. The photo above is still one of my favorite photos because of the roaring fire behind the mug. This photo still tells a story, and I am very proud that I was able to capture a tiny bit of steam.
That being said, I wish the steam was more pronounced.
If I had known then, what I know now, I would have taken a few cotton balls, placed them in a cup of water, and microwaved them for about 1 minute.
Next, I would have strategically placed the cotton balls behind the mug. It should emit much stronger steam than the hot water alone, and I would have been able to tell a visual story even more effectively.
You can do this with tampons if you so choose but I never wanted to waste them.
Cotton balls are probably hidden in your bathroom cabinet somewhere, right?
If you find this still isn’t working, you may need to add more cotton balls. If it still isn’t working out, you could try a steamer if you have one for your laundry!
Cotton balls can be a game-changer when it comes to adding a sense of warmth and freshness to your food photos. If you’ve ever struggled to capture that perfect steam rising from a hot dish, cotton balls might just be your new best friend. Simply wet a few cotton balls with water and microwave them for about a minute. Then, strategically place them behind your food, just out of the camera’s view.
As the cotton balls dry, they release steam, creating a misty effect that adds depth and atmosphere to your image. This trick can make your food look freshly cooked and piping hot, even if it’s been sitting out for a while. It’s a simple yet effective way to enhance the visual appeal of your food photos and make them look even more appetizing.

Food Styling Tip #2: Fun Tak to Hold Items in Place
You remember hanging posters of teen idols on your walls with this stuff so your parents weren’t angry you put holes in their freshly painted walls, right?
No?
Just me?
Well instead of plastering your wall with Justin Timberlake, you can use it to hold various items in place during your food photography shoot.
In the photos above, I used the fun tack to hold the little red, white, and green, candy buttons in place on the red surface. They were rolling all over the place and getting stuck in the arms and legs of the gingerbread cookies.
Without the fun tak, I wouldn’t have been able to get that shot. While I prefer the shot of the cookies without the candy buttons, it might have needed to be there depending on the purpose of the shoot. Using fresh food specifically prepared for the shoot can also enhance the visual appeal, especially when creating steam effects.
This can be used for anything that isn’t cooperating or staying in place and you might already have it in a junk drawer somewhere.
Oh, you don’t have a junk drawer? Well, you can buy it then!
Fun Tak, that trusty adhesive putty from your school days, is a secret weapon for food stylists. When you’re photographing food, the last thing you want is for your carefully arranged props to start rolling around. Fun Tak can help you keep everything in place without damaging surfaces or leaving any residue.
Whether you’re trying to keep a stack of cookies from toppling over or ensuring that a delicate garnish stays put, Fun Tak is your go-to solution. Just a small piece can hold items securely, allowing you to focus on capturing the perfect shot. It’s a simple tool that can make a big difference in the precision and quality of your food photography.

Food Styling Tip #3 Scotchguard on Pancakes (or Waffles, or French Toast!)
Scotchguard. Not something you really want to spray on your food, right? In the world of food styling, we aren’t concerned with the taste of the food as much as we are the presentation.
Enter stage right, Scotchguard!
The stuff you spray on your furniture or carpet so that if you do make a mess, your fabric is protected.
When you spray fabric protector on pancakes (or waffles! or french toast!) and then pour maple syrup on top, the syrup will take longer to sink into the pancakes.
This prolongs the shooting time and makes it easier for you to get the coveted pour shot, or hey, even the “hero” shot, and make it look more appealing for photography.
I hope this goes without saying: Don’t eat the pancakes when you’re done.
Scotchguard might sound weird when it comes to food, but it’s a lifesaver for food photographers. When you’re trying to capture that perfect pour shot of syrup cascading over a stack of pancakes, the last thing you want is for the syrup to soak in too quickly. That’s where Scotchguard comes in.
By spraying a small amount of Scotchguard on your pancakes, waffles, or French toast, you can prevent the syrup from sinking in too fast. This gives you more time to get the shot just right, ensuring that your food looks as delicious as it tastes. Just remember, these dishes are for the camera, not for eating!

Food Styling Tip #4: Citric Acid & Water to Prevent Browning
Have you ever cut a piece of fruit in half and had it brown within five minutes? Yeah, me too.
There’s nothing more frustrating than seeing your beautifully sliced apples turn brown before you’ve even had a chance to snap a photo.
Luckily, there’s a simple solution: citric acid and water. This mixture can help keep your fruits and vegetables looking fresh and vibrant for longer.
To use this trick, mix 1 to 3 tablespoons of citric acid or lemon juice with a cup of water. Brush the solution onto your sliced fruits and vegetables to prevent browning.
This will keep them looking fresh and appetizing, ensuring that your food photos are as stunning as possible. Just be careful not to let the solution stain your props or surfaces – a quick scrub should take care of any accidental spills.
We spend a lot of time setting up our shots. We have a lot to do to make sure that we are ready to shoot.
We have to make sure our batteries are charged, choose our props, choose our surfaces and backdrops, prep the food, set up our tripod, our lights, take some test shots, and prep some ingredients.
The list goes on.
Cutting an apple in half to add some dimension to your shot is not a bad idea. In fact, I fully support that idea! You might want to wait until you are almost ready to shoot.
That being said, even if you are a few minutes away from shooting, those apples will brown by the time you start or at the very least while you’re in the middle of your shoot.
After everything is over, you’ll take your memory card out of your camera, put it into your computer, import those photos into Lightroom and as you’re hitting the arrow key and culling your images you will see, clear as day, that those apples were …great looking,
…fine …still ok … and then suddenly … Brown and not as fresh looking as when you started out.
You finally nailed your composition and your apples are brown.
this reminds me of a Buffy the Vampire Slayer quote from Season 4, Episode 9 “Something Blue.” A depressed Willow crashes Buffy and Riley’s picnic and says:
“Your apples are turning brown…the way they do.”
To which Riley replies: “Yeah, I guess they do that…”
Yeah, y’all! Apples turn brown! So the “holding technique” that food stylists use to hold sliced apples on a set is to soak them in a mixture of citric acid and water. You can also use lemon juice and water.
1 – 3 Tablespoons of citric acid or lemon juice in a cup of water should do the trick.
Just a quick PSA: Don’t lick your fingers after you’ve done this. It was a complete accident and it was disgusting. I do not recommend it!
Also just another quick warning: The citric acid stained my wood backdrop. It seems to have gone away after I scrubbed it.
#5 Windex & Q-Tips for Splashes, Dust, and Fingerprints: Stunning Images
Anything that splashes or sticks to the inside of a bowl, plate, or mug is the bane of my existence. Sounds weird, but there have been too many times that I have ignored it while shooting and thought: “I can fix that later.”
Sure, I can fix it later. I can shoot everything “as is” and then open Photoshop after all is said and done and retouch my image. I can remove any spots that don’t belong with the spot healing tool or the clone stamp tool. No big deal.
Actually, kind of a big deal.
If I don’t have to do that as part of my post-processing, I’m happier because I just gained back some of my precious time. While cloning out some splashes of food may not be hard, it can take a while.
Maybe instead of sitting at my desk for an extra 30 minutes, I’ll go take a walk! (or a nap!)
So when you notice a bit of food on your plate or inside your bowl that you know you’ll probably try to remove later, just grab a Q-Tip and a small amount of Windex. Spray the Windex on the Q-Tip and wipe the splatter away.
You can do this with water instead of Windex but I always find that I just make it worse by spreading it around. The Windex helps make sure it is really clean.
There you have it! 5 simple food styling tricks using everyday items! I know you know this already, but, it is worth mentioning that if you use some of these tricks, your food might no longer be safe to eat.
Overall, you’re trying to create a story through Food Styling
Food styling is not just about making food look pretty; it’s about creating a story that draws viewers in and makes them want to take a bite. A good food stylist uses props, lighting, and composition to evoke emotions and appetites. Think about the last time you saw a food photo that made you crave the dish – chances are, it was because the stylist created a compelling narrative around the food.
From the rustic charm of a wooden cutting board to the elegance of a fancy restaurant setting, every element in the frame contributes to the story.
The way the light hits the food, the arrangement of fresh ingredients, and even the choice of background can all influence how viewers perceive the dish. By paying attention to these details, food stylists can create stunning images that not only look good but also tell a story.
Have you tried any of these tricks? Maybe you plan to? Let me know in the comments or on Instagram!